
PERMACULTURE: Planting Outside The Garden Box
- Apr 1, 2024
- 8 min read
By Mary 'Klibs' Dralle, for Let’s Talk Plants! April 2024. All photos are courtesy of the author except the garden rack by Dirty Buffalo Productions and cover photo from Wix stock pictures.

Planting Outside the Garden Box
As this article is being penned, the first of February is upon us. For those of us who live by the life cycle of trees, it is the first day of spring. Yes, there may be storms and weather coming our way, but the deciduous trees are waking up and the sap is coursing through their trunks. Some burrowing animals are coming out of their dens for a good look around, the hawks are starting to pair off to create new life, and bulb plants are coming up in our gardens. We are fortunate to have a year-round planting schedule in southern California. However, now is the time to start to prepare for the next year's growing season by looking at seeds on hand, dusting off and reviewing the planting calendar, checking on compost/soil supply, and cleaning up tools.
It is time to freshen up the garden beds, as well. Some portions of the population have very small, or non-existent, yards and we plant in whatever is convenient to use. How does Permaculture play into this plan, you may ask? One of the tenements of Permaculture is ...
“The Solution is in the Problem”.
If our goal is to reduce the world's trash, it means giving new life to something that would be sent along to the landfill. As mentioned in a previous Urban Carbon Farming article, 5-gallon buckets make excellent grow containers. They must be food grade and not old paint buckets. They can be obtained as pickle buckets from sandwich shops, frosting buckets from bakeries or tomato sauce buckets from pizzerias for FREE. Use them individually in a small sunny space or stair stepped on a frame for a bigger scale container garden.
5 Gallon Bucket Planter - What can we grow? Many foods can be grown in a bucket: perennial plants like blueberries, blackberries, thyme, rosemary or lavender or annuals such as lettuce, basil, tomatoes, peppers, and chives. They are still planted as we would in any other designated garden container. However, if you do not have the containers to begin with, it is a great way to repurpose a bucket into a new use. Also, if it needs to be moved, it has a handle!
What you will need:
5 gallon bucket with LID
Drill
1/2" Drill Bit
Amended Potting Soil - 60% Soil : 40% Compost ~ 0.75 cubic foot - (Best to get one bag of potting soil and three quarters of a bag of compost. Mix together. Will fill approximately two buckets.)
Mulch < 0.25 cubic foot
Plant of your choosing
Let's Get Planting:
Place in a sunny spot just outside the front door or on any available space like the apartment balcony. Drill four or five 1/2" drainage holes in the bottom.
Use the bucket lid as saucer under the bucket. Fill halfway with amended potting soil, add the plant and finish off with more soil leaving a 3"-4" space at the top for mulch.
Water until soil is moist and water comes out of the bottom.
Monitor and Harvest:
Water when soil under mulch is dry.
Harvest when plant is ready. Use standard plant specifics to determine harvest conditions.
Kratky Hydroponic System - Invented by B.A. Kratky from the University of Hawaii for lettuce, spinach, and annual herbs like basil. This system is a non-recirculating, completely passive method that does not require pumps, electricity, or wicks. Plants are suspended over a nutrient solution that is fixed to the top of a small container. Plant roots are partly submerged into the water and partly exposed to the air. This way, the plants can get water as well as oxygen.
What you will need:
1-5 gallon bucket with LID
Drill
2"-hole saw
4 Yoplait yogurt cups
Sharp Scissors
5 gallons of water
Dr. Earth Home Grown Organic Natural Vegetable Food
SEA-90 Organic Fertilizer for Hydroponics
Large bottle with cap
Let's Get Planting:

First, place the bucket in its sunny grow site and fill it with water, about 2-3 inches from the top. Allow water to off-gas the chlorine overnight.

Meanwhile, drill four 2-inch holes in the lid with the drill and 2"-hole saw.

Cut the yogurt cups open on the side and cut out the bottom.

Next day, dissolve about 3 - 4 teaspoons of Dr. Earth Home Grown Organic Natural Vegetable Food and 1-1/4 teaspoons of SEA-90 Organic Fertilizer for Hydroponics into a large bottle of very hot water (not pictured). Screw on cap and shake the bottle to dissolve the components.

Pour the solution into the bucket of water.
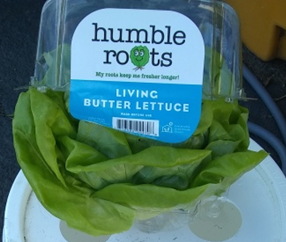
Obtain living bare root lettuce, or herbs, from the produce section of the grocery store.

Open up the cut yogurt cup and place the root ball of the plant as close to the original top as possible. The original top of the cup will be the 'new' bottom and sit in the water.
Gently close the cup around the root ball and slip it into one of the four holes on the lid.


Press it down until the lip of the former bottom contacts the lid of the bucket.
NOTE: If the root ball of the plant is almost as big as the 2-inch hole and the plant extends past the hole itself, the cup may not be necessary.

Once all of the plants are placed in the lid, put it on the bucket and let it rest there for about an hour.
At that time, lift the lid to ensure that the roots are in contact with the water. Add a bit more if necessary.
Note: Lettuce can burn in the sun, and it may be necessary to provide shade at times and a double layer of organza can be draped over the plants.

If bugs start to eat the plants, use 1 teaspoon of biodegradable lemon dish soap in one quart of water along with a 1/4 teaspoon each garlic powder and chili powder. Spray plants as needed.

Additionally, cover with a piece of organza, but unlike the previous step, it needs to be wrapped around the backside of the bucket, excess can be tucked into or wrapped around the bucket handle.
Monitor and Harvest:
Check the water level every other week by removing the lid and ensuring the plant roots are in the water.
If more water is needed, mix one gallon of chlorine free water with 3/4 tsp Food and 1/4 tsp fertilizer.
To harvest -
Remove the outside leaves while allowing the center leaves to grow. When the plant is spent, remove and replace it with a new one.
Wicking Bed - To grow tomatoes, chili peppers and cilantro for a salsa - this practice was invented by Colin Austin in Australia. A water reservoir is created in the bottom of the planting bed. Rather than irrigating the soil at the top and losing it to evaporation before the plant can use it, the water wicks up into the soil from below, keeping it nice and moist. This works well in semi-arid deserts like Southern California.
What you will need:
1–5-gallon bucket
gallon beverage jug - it can be a juice, milk, or water jug so long as it is clean and rinsed
Pen
Drill
Drill Bits, 1/8" and 1/2"
3 feet of 1/2" PVC pipe - 45 degree angle cut on one end
Funnel
Amended Potting Soil - 60% Soil/40% Compost ~ 0.75 cubic foot - (Best to get one bag of potting soil and about three quarters of a bag of compost. Mix them together. This will fill approximately two buckets)
Mulch < 0.25 cubic foot
Let's Get Planting:
Mark hole locations with a pen; four, approximately 3-4 inches down from the top. These will be 'air' holes. And four more, about 2 inches up from the bottom. These will be the water drain holes.


Drill 8-1/8" holes in the sides of the beverage jug.
On the bucket, measure up 5 inches from the bottom and drill a 1/2 inch.

This will be the drain hole for excess water from filling the jug.

On the bucket, measure up 5 inches from the bottom and drill a 1/2 inch.
This will be the drain hole for excess water from filling the jug.
Using a hacksaw, cut the end of the pipe at 45-degree angle.

Put pipe in the jug and align it over the handle.
Place jug into bucket in front of the drain hole so that the handle lines up.

Fill the bucket two thirds of the way with amended potting soil.
Place the plants.
Backfill with soil leaving about 2-3 inches at the top for mulch.

Fill the jug, via the pipe and funnel.
Water the plants from the top until the soil is moist. This will be the only time to water on top.
Keep adding water via the standing fill pipe until water comes out of the drain hole.


Add mulch, or grass clippings, to cover.

As mentioned above, if bugs start to eat the plants, use 1 teaspoon of biodegradable lemon dish soap in one quart of water along with a 1/4 teaspoon each garlic powder and chili powder. Spray the plants, as needed.
Additionally, cover with a piece of organza wrapped around the backside of the bucket, and excess can be tucked into or wrapped around the bucket handle.
Monitor and Harvest:
On a weekly basis, add water via the pipe until it comes out of the drain hole - this will be a small amount.
Harvest when plant is ready - Use standard plant specifics to determine harvest conditions.

If there is room for it, a 5-gallon bucket container garden rack could be built to increase growing capacity. This one is from Dirty Buffalo Productions, which has great instructions and parts list, https://www.youtube.com/watch?v=cJh5A7eGmjU.
All of the methods presented so far could fill this rack. It would be best to have the wicking beds, the least plants needing watering, on the top rack; regular planting containers on the second; and the Kratky hydroponics on the bottom rack.
While a couple of plants have been listed in this article, there are many more that can be grown in a bucket. An all-time favorite is potatoes! Once this system is set up, it can be used over and over again for many years to come so long as it is cleaned in between plantings. Best part, if you have to move, your food can come with you. Here are a couple of other containers that can be used to grow food.

In addition to buckets, a kiddie pool can be used to plant an herb garden.
This is similar to the 5 Gallon Bucket Planter.
36" Wide Kiddie Pool
Drill
1/2" Drill Bit
Amended Potting Soil - 60% Soil : 40% Compost ~ 0.75 cubic foot - (Best to get one bag of potting soil and three quarters of a bag of compost. Mix together. Will fill this pool.)
Mulch, 0.5 cubic foot
Plants of your choosing
Let's Get Planting:
Drill 4-6 holes in the bottom
Fill with soil
Plant
Water
Cover with Mulch
Monitor and Harvest:
Water when soil under mulch is dry.
Harvest when plant is ready - Use standard plant specifics to determine harvest conditions.
Or repurpose a Big Sandy Sand Barrel to grow a nutritious delicious bunch of stinging nettles.

Note: Author used to work for the manufacturer of this crash cushion called a Big Sandy. When they came back from the field, the company offered them to employees who knew how to repurpose them.
Waste Not, Want Not

So, take a look around your place and see what you can use to grow food! Repurpose as much as possible so as not to waste what you have.
Until next time, keep those hands soiled,
~ Mary
